Remodeling an interior space requires a strict “order of operations” to prevent costly mistakes and frustrating delays. Many homeowners mistakenly believe the first step involves swinging a hammer at a dated wall or ripping up carpet. The reality is that successful renovations begin long before any physical labor takes place on the property.
At Avantgarde Improvements, we follow a “critical path” that dictates the most efficient order for completing construction tasks. Following this established sequence prevents you from damaging new finishes or redoing work. You certainly do not want to install brand-new hardwood floors only to scratch them while painting the ceiling. This guide outlines the exact roadmap we use to achieve professional, high-end results.
1. The Planning Phase: Your True Starting Point
The absolute first thing you must start is a plan and a realistic budget for your interior renovation in Montgomery County, PA. Changes made on paper cost nothing, but changes made after demolition will drain your bank account rapidly.
- Finalize Layouts: Determine every wall placement and cabinet dimension before a single stud is moved.
- Material Selection: Select your finishes now. This includes ordering items with long lead times, such as custom cabinetry, European windows, or specialized light fixtures.
- Permitting: Most significant interior changes require approval from your local building department. Skipping this can lead to heavy fines or complications when you eventually try to sell your home.
2. Demolition and Structural Integrity
Once your plan is solid, demolition represents the first physical phase. This involves removing everything being replaced: walls, flooring, cabinetry, and old fixtures.
- Structural Modifications: This is the time to address any framing changes. If you are creating an open-concept living area, you will install the necessary load-bearing beams now.
- Waste Management: Rent a dumpster and establish a debris removal plan. A clean job site is a safe job site, and it sets a professional tone for the skilled trades arriving in the next phase.
| Task | Priority | Note |
| Debris Removal | High | Prevents accidents and dust accumulation. |
| Structural Beams | Critical | Must be inspected before any other work continues. |
| Hazard Testing | Mandatory | Check for asbestos/lead in homes built before 1978. |
3. Rough-In Mechanics: The “Guts” of the Home
With the walls open and the framing exposed, you must install the mechanical systems. This is the Rough-In Phase. You should never close up walls until these systems pass inspection.
- Plumbing: Plumbers install new supply lines and drain pipes. This is the optimal time to replace old galvanized pipes that are nearing failure.
- Electrical: Electricians run wiring for outlets, switches, and lighting. Consider future-proofing here by adding data cables or extra outlets for mounted televisions.
- HVAC: New ductwork or vent relocations happen now to ensure optimal airflow in your new layout.
4. Insulation and Drywall Installation
After the mechanical systems pass inspection, you begin rebuilding the interior envelope.
- Insulation: This improves energy efficiency and provides sound dampening between rooms.
- Hanging & Taping: Drywall transforms the skeleton of the room into a recognizable space. This requires multiple coats of joint compound and patient sanding.
- Dust Containment: Sanding creates fine dust that can penetrate every corner of your house. We recommend sealing off the work area completely and covering all HVAC return vents.
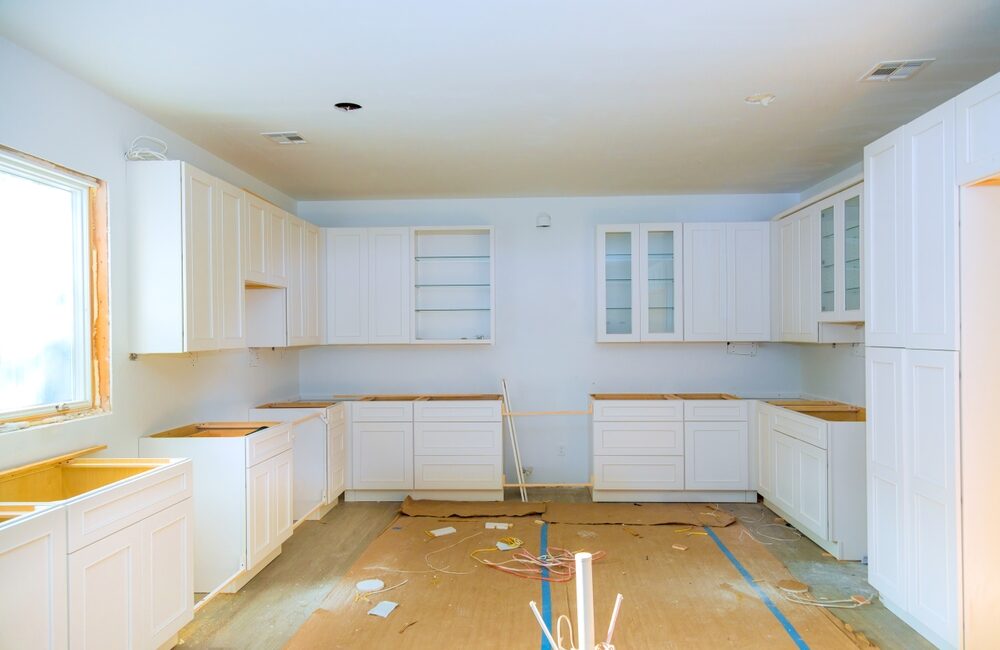
5. The Finishing Sequence: Paint, Flooring, and Cabinets
The order of operations becomes slightly flexible here, but at Avantgarde Improvements, we prefer a “top-down” approach to protect your investment.
Paint First
We typically prime and paint the ceilings and walls before installing new flooring. This prevents paint drips and splatters from ruining expensive new carpet or hardwood.
Flooring vs. Cabinetry
- Hardwood & Tile: These usually go in before cabinetry to provide a clean, level surface for the cabinets to sit on. This also simplifies future layout changes.
- Floating Floors: Some laminate or luxury vinyl plank (LVP) floors must be installed after heavy cabinets to prevent buckling due to weight.
- Acclimation: If you are installing hardwood, the wood must sit in your home for several days to acclimate to the humidity levels before installation.
6. Trim, Fixtures, and the Final “Punch List”
The final phase involves installing the “jewelry” of the home. This is where the aesthetic vision truly comes to life.
- Carpentry: Finish carpenters install baseboards, door casings, and window trim. This hides the gaps between the drywall and the flooring.
- Electrical/Plumbing Finish: This is when light fixtures, faucets, and switch plates are installed.
- The Punch List: Before the project is “done,” perform a final walkthrough. This list identifies any minor defects or outstanding items, like a paint scuff or a loose cabinet handle, that must be corrected before final payment.
Summary Checklist for a Successful Remodel
- Planning: Finalize all layouts and material selections.
- Demolition: Remove old materials and verify structural needs.
- Mechanicals: Rough-in plumbing, electrical, and HVAC.
- Surfaces: Install insulation, drywall, and initial paint.
- Finishes: Lay flooring, install cabinets, and add trim.
- Details: Install fixtures and complete the final punch list.
Conclusion
Knowing what to start first is the difference between a smooth transformation and a chaotic nightmare. While the physical work begins with a sledgehammer, the true success of an Avantgarde Improvements interior remodel near Philadelphia is rooted in the weeks of planning that happen beforehand. When you respect the order of operations, you protect your budget and ensure a high-quality finish that lasts for decades.